
this edition of "expensive shit you can actually just make yourself" is all about our favorite piece: the scarf. while perusing the free people website one day we came across the plaid scarf pictured below. its a decent scarf. plaid is pretty awesome most of the time and these colors are interesting. but in the end, the truth is that this is a tiny scrap of flannel that you will be paying $32 to own when you can easily DIY. we thought we could do better! turns out, we did...

the free people menswear stripe skinny scarf
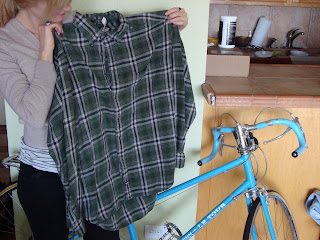 step 1. we found an xl men's flannel at a thrift store for $2.99. note: it has to be flannel! any synthetic fabrics won't rip the right way.
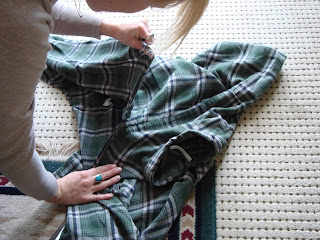 step 2: make a tiny cut at the bottom and rip straight up the grain of the fabric. we made three equal-length sections to put together, and even included a pocket on one.
 step 3: sew pieces together with contrast zig-zag stitching to complete the well-worn/rough edges effect. we used a bright turquoise thread.
the end result is a soft, funky, hip plaid scarf that cost $2.99 and took a total of fifteen minutes to make. the best part is that by DingIY you can choose the fabric, width and length you like.
all-in-all, making this was literally easier than going to the store and paying money for the free people scarf, even if we would've been okay with spending the $32 (which we wouldn't have been). happy sewing!
cheers!


Is that scarf (on Eleanor) just bunched up, or is it tied in a special way? When I wear scarves, I'm always wondering how to make them look fuller; how did Eleanor wrap and tie this?
ReplyDeletehello welterskelter, it's elinor!
ReplyDeletei wear scarves a lot and i only really buy long scarfs so that's my main area of expertise. here's how you can solve it:
1. start by draping the middle part of the scarf around your collar bone, like how you would like a necklace to hang.
2. wrap the ends of the scarf behind your neck once, then pull them to the front
3. take the ends and tie them loosely below the drape in front (you may have to retie them periodically throughout the day)
4. manipulate the front drape to make it look fuller or come up higher on your neck, in the above picture i just pulled the scarf out to it's full height instead of letting it hang down
5. repeat as necessary given the length of the scarf. if it's a real long scarf (the scarf in the picture is about a yard) it might be easier to wrap and drape several times making it look extra full
do you know the "europe knot"? i don't know what it's really called but i learned it in europe so...that also works:
1. fold scarf in half
2. put the folded end behind your neck on the left side and hold it in your hand
3. take the ends in your right hand and pull them through the loop you're holding in your left hand
4. adjust and fluff the knot to your liking
hope that helps!
el
Ken, I love your blog! What a fun idea. Maybe you come find some fashion in Colordado Springs (HAHAHAHAHAHAHA)!
ReplyDeletelove/miss you!!
thanks
ReplyDelete